In this post, we will understand how can we use font-awesome icons in Photoshop. Font-awesome is a font library that contains hundreds of useful & latest icons in form of fonts. We can use these icons in our Photoshop design by following these easy steps. So let's just start:
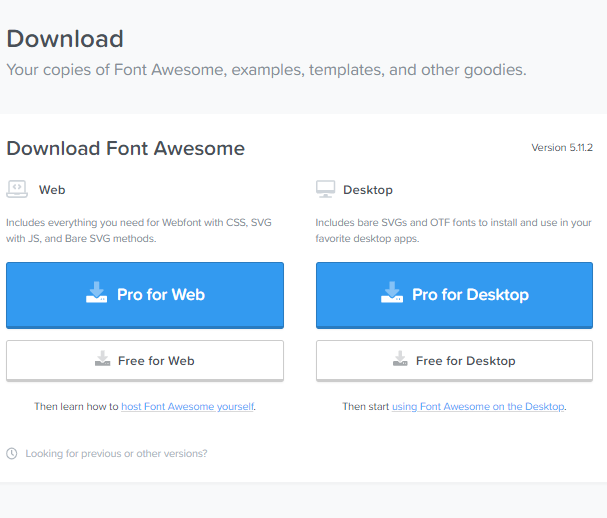
Step 1: Visit Download page of Font Awesome library from this link - https://fontawesome.com/download & click on Free for Desktop button to download free fonts for your computer.
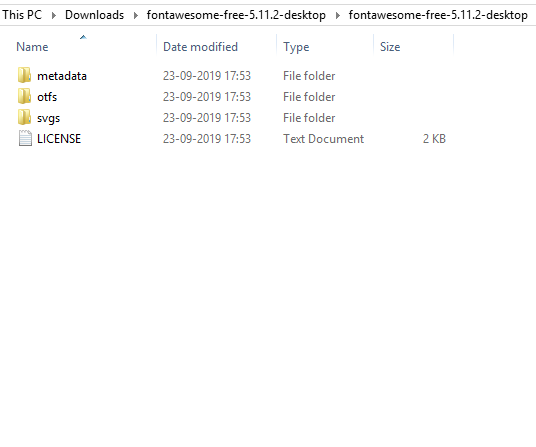
Step 2: Now, unzip the downloaded folder. You will found the folder structure like below.
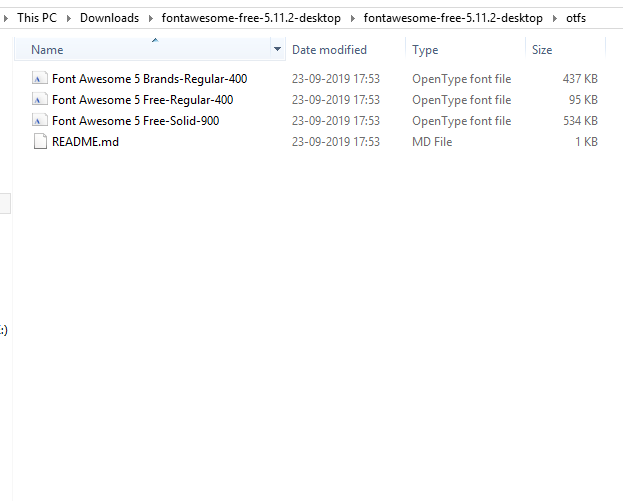
Step 3: Double click on otfs folder, you will found 3 font files like below.
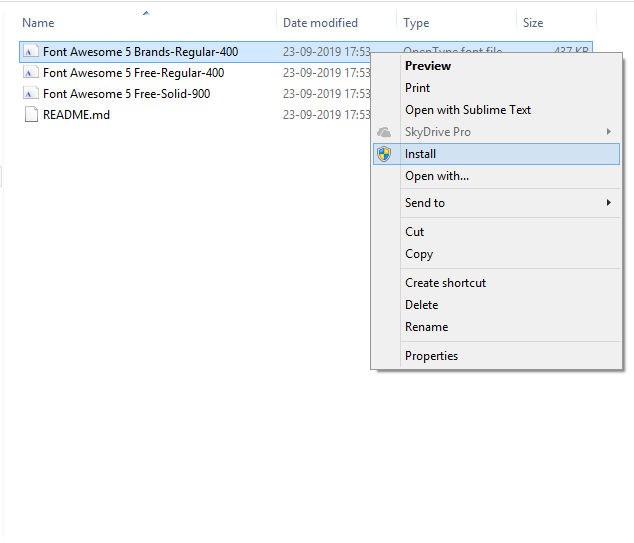
Step 4: Now, right click on all these 3 files one by one and click install button to install these fonts on your system.
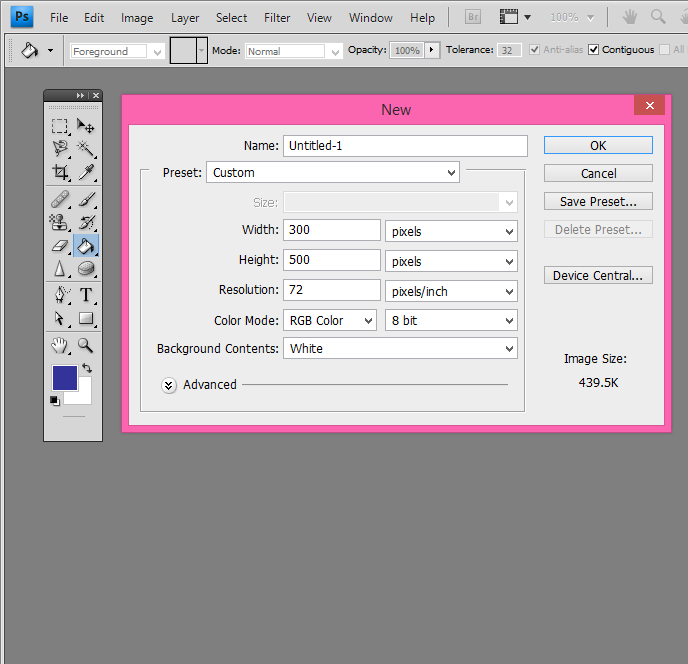
Step 5: Open Photoshop and create a new design. You must see a popup window like below. Select height & width of the design here.
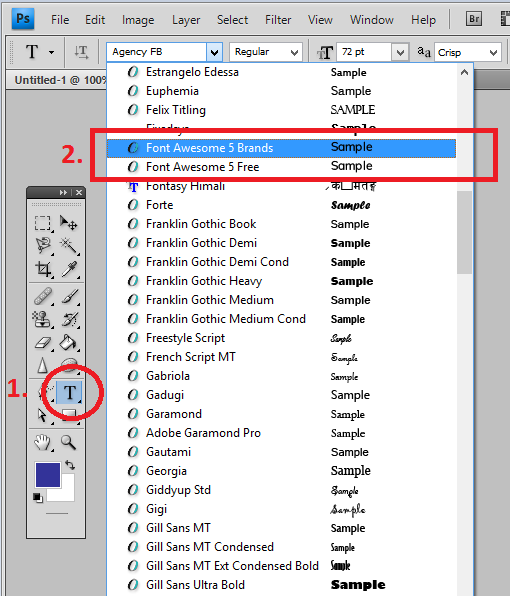
Step 6: Now, select the text option from the toolbox & open the fonts drop-down. Here you can find the font-awesome fonts which we just installed in previous steps.
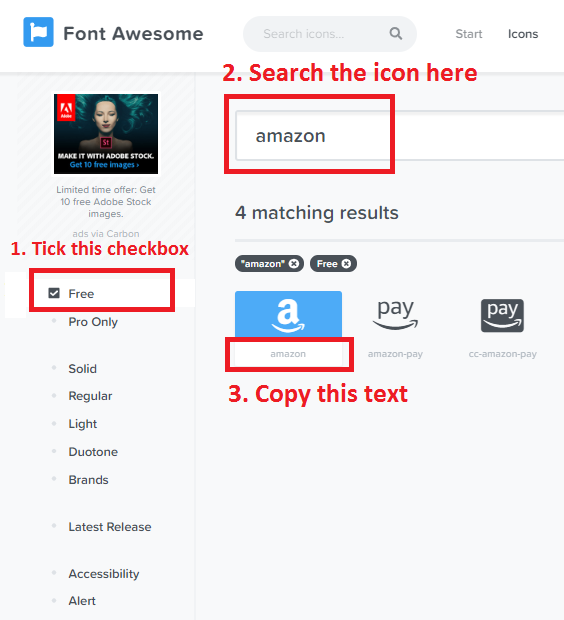
Step 7: Open this link - https://fontawesome.com/icons and search the icon which you want to use. Once you find the icon, copy the icon text.
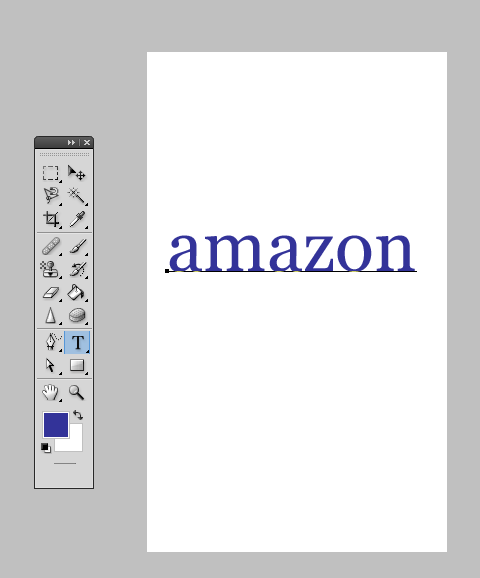
Step 8: Now, paste the copied text into Photoshop like below.
Step 9: Select all the text and select the font-awesome font from the drop-down. As soon as you select the font from the drop-down, this text will be converted into the icon.
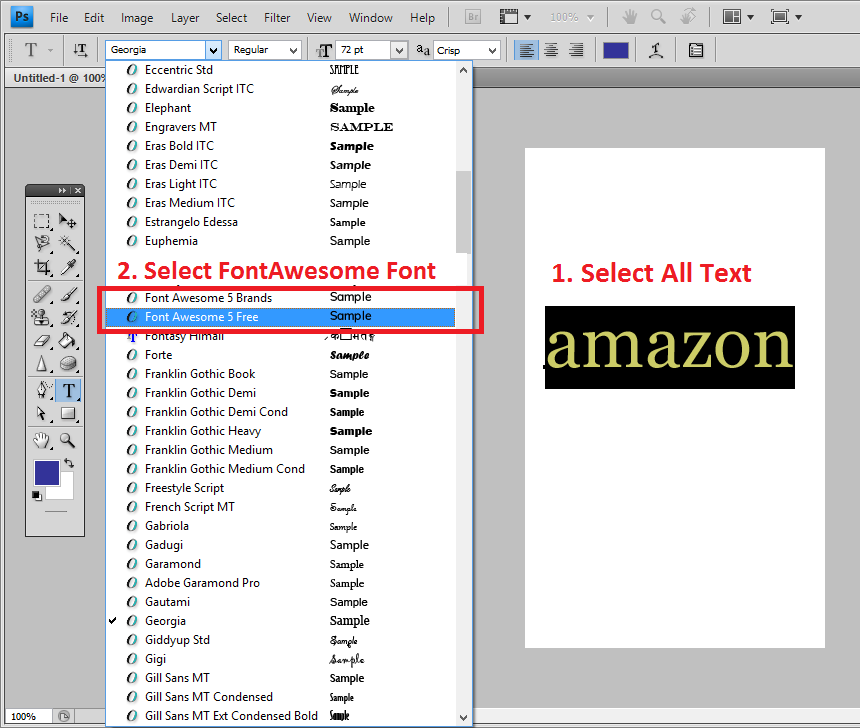
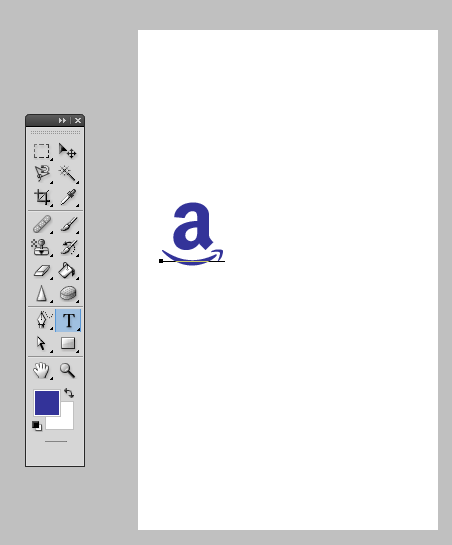
Step 10: This is the final result. You can see the font-awesome font is now displaying as an icon or image in Photoshop.
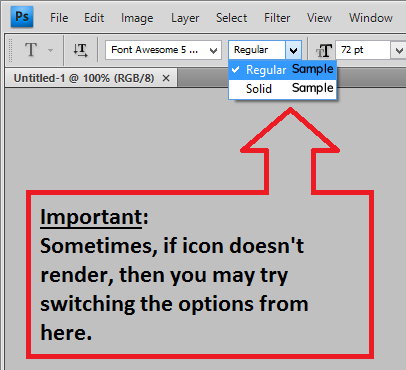
Step 11: Important: Sometimes, you may find that even after selecting the font-awesome font, text is not converting into an icon. For this issue, you may try switching the two more available options Regular and Solid. This should fix your issue.
That's all. Please share you queries, feedback in below comment box.