In this post, we will understand how can we integrate famous .NET Logging Library - Log4Net in our ASP.NET project. Though, particularly in this post I am using an ASP.NET Web API project, but the implementation will almost remain the same even if you want to integrate Log4Net in other ASP.NET applications such as MVC & Web Forms.
Log4Net Integration with ASP.NET WEB API 2 and SQL Server
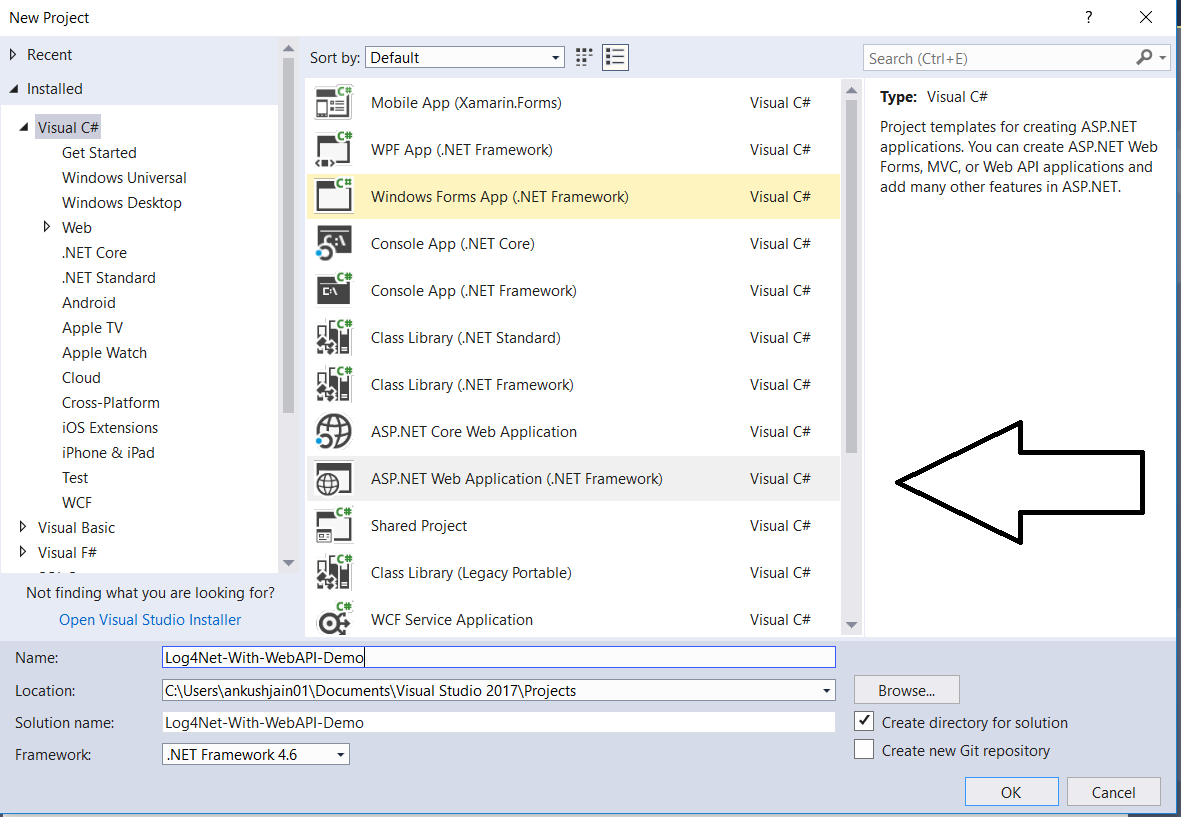
Step 1: Select ASP.NET Web Application (.NET Framework) project type from the list to create any ASP.NET Application (Web Forms, MVC or Web API).
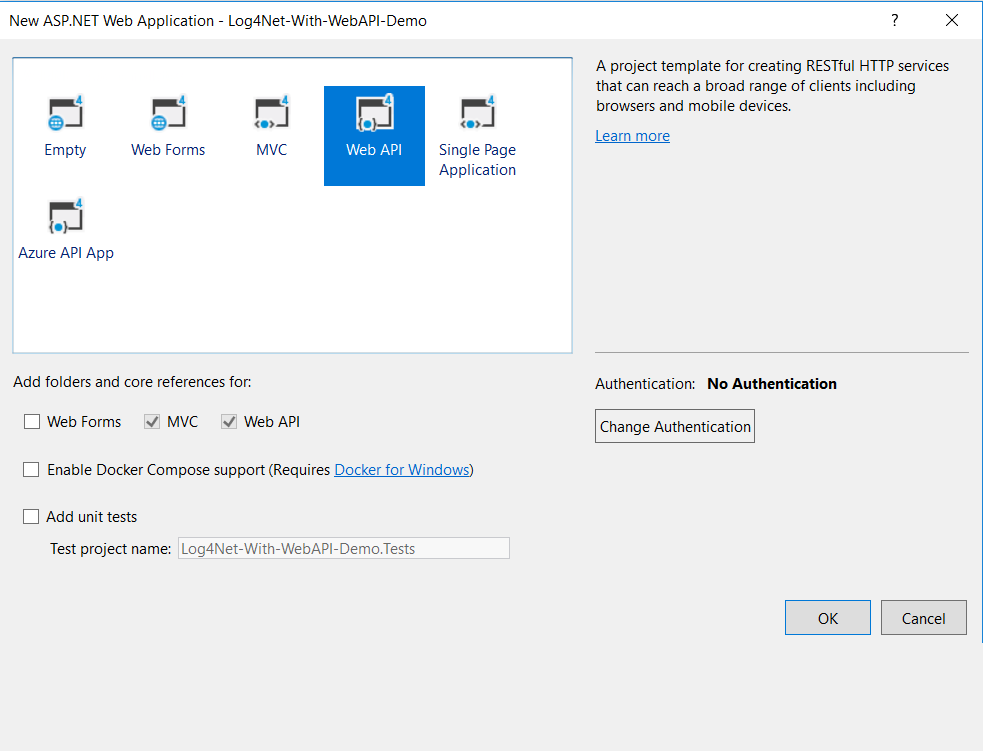
Step 2: Now select Web API project template as your ASP.NET Application.
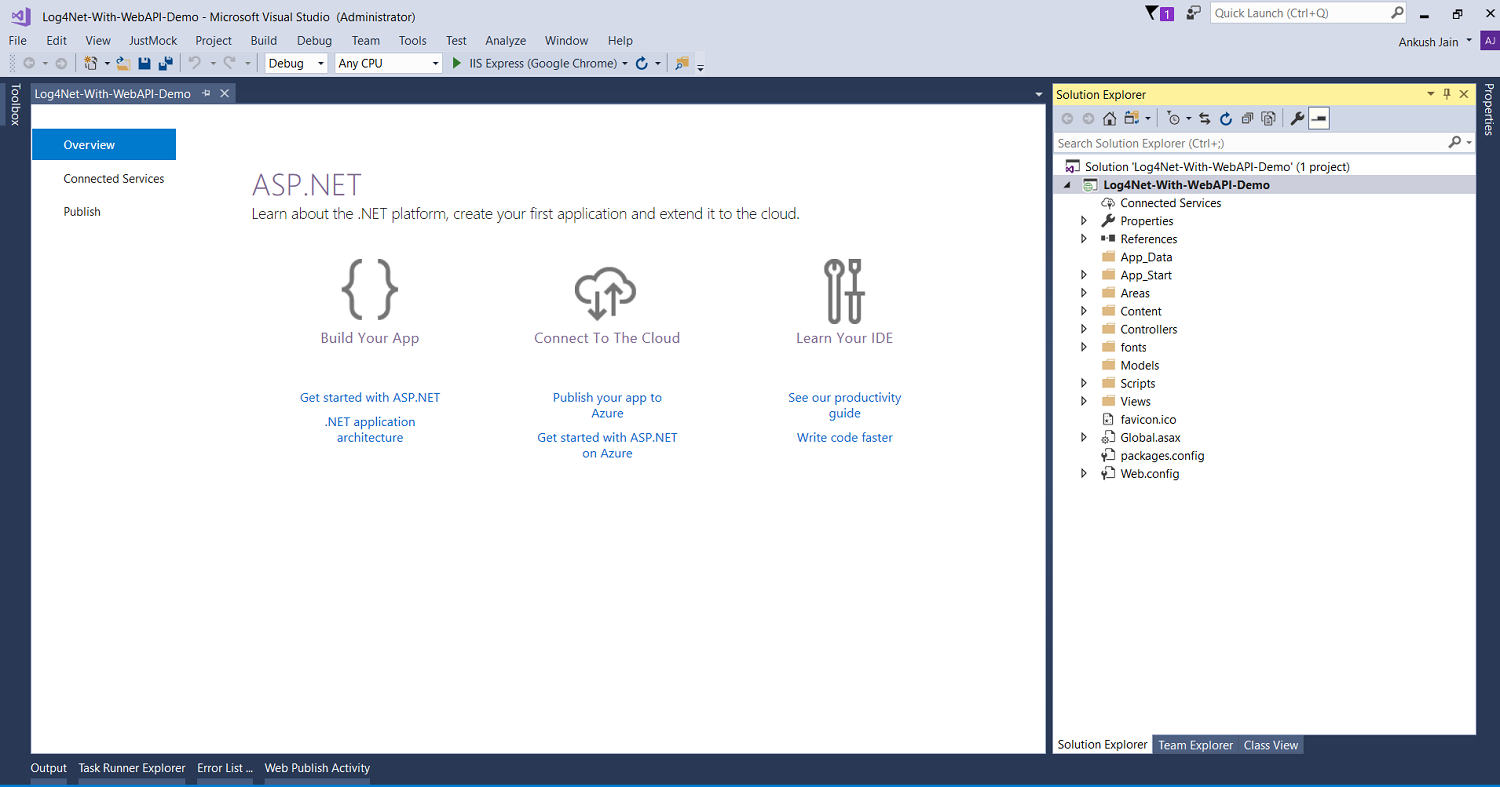
Step 3: Once you select the WEB API project template, Visual Studio will create a solution for you with WEB API project. You will see a similar page on your screen after creating this project.
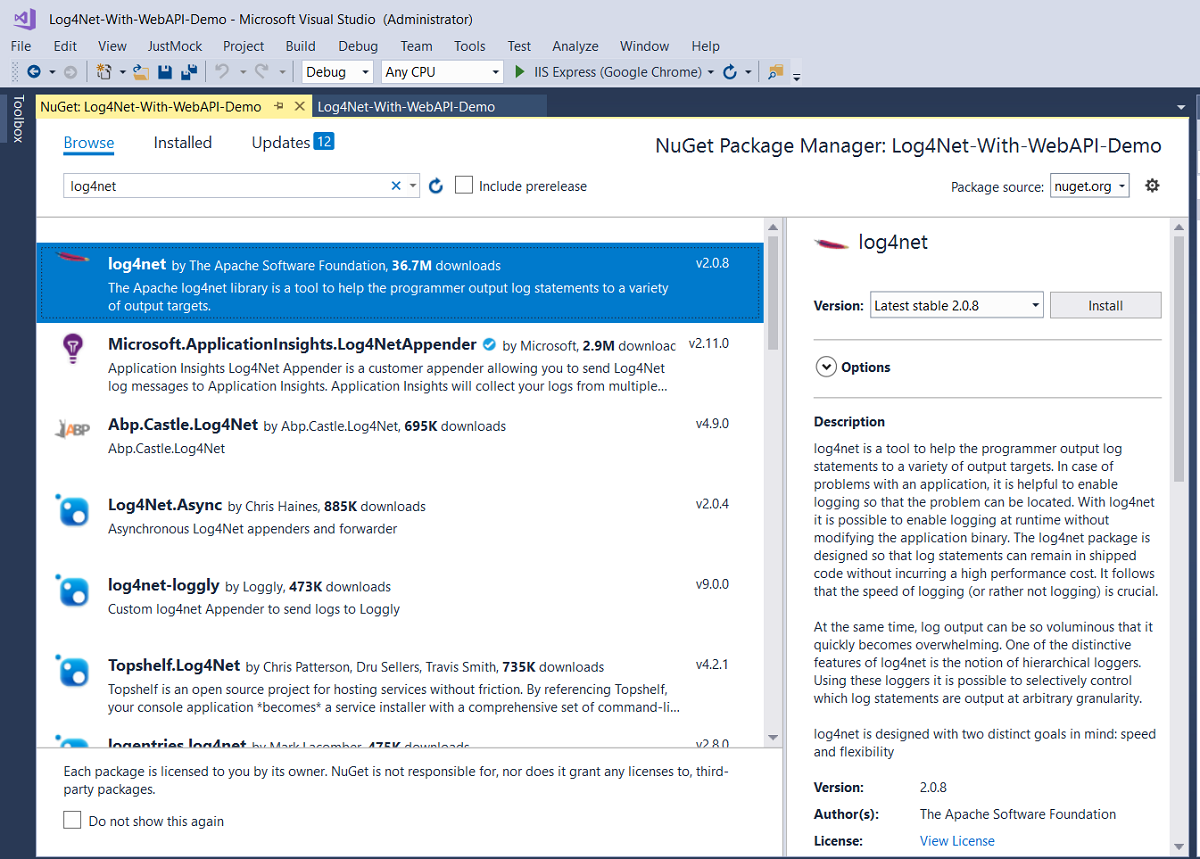
Step 4: Now, install log4net Nuget package in your Web API project.
Step 5: Now that you have installed log4net Nuget package, you can open References node of the project & verify that log4net DLL is present there.
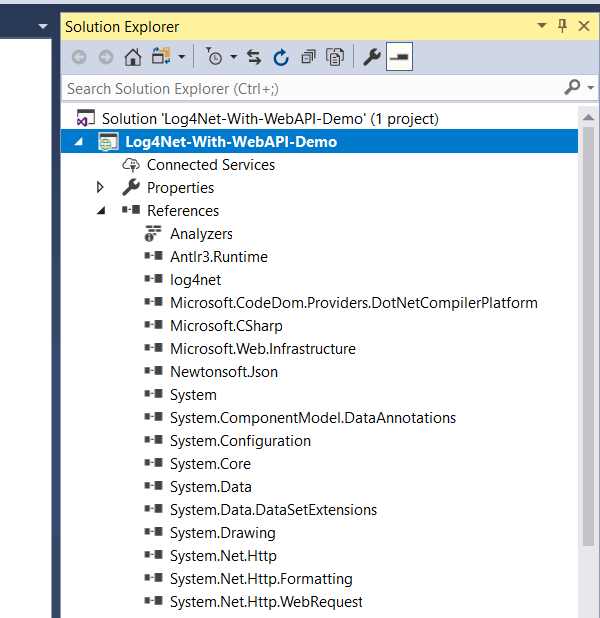
Note: So far we have done the stuff to create the Web API project & install the Nuget package of
log4net. Now, in next few steps - we will work with SQL Server to create the database where we will be logging the information, errors, warnings etc.
Step 6: Open SQL Server Management Studio & connect with the server using valid credentials.
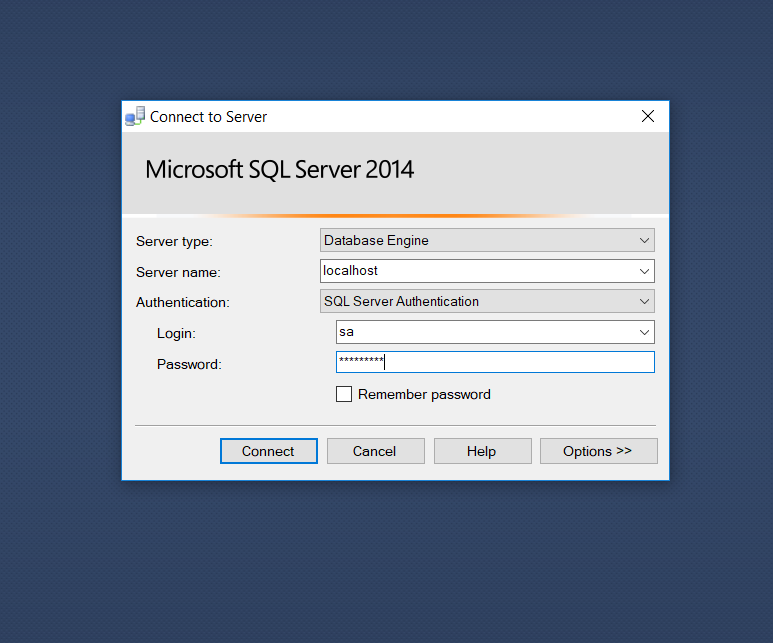
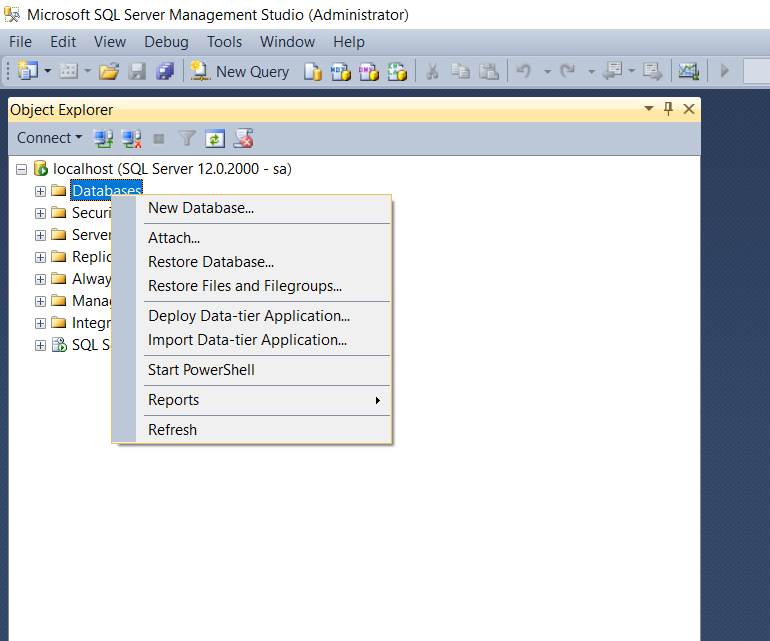
Step 7: Once you are inside SQL Server, create a new database like below.
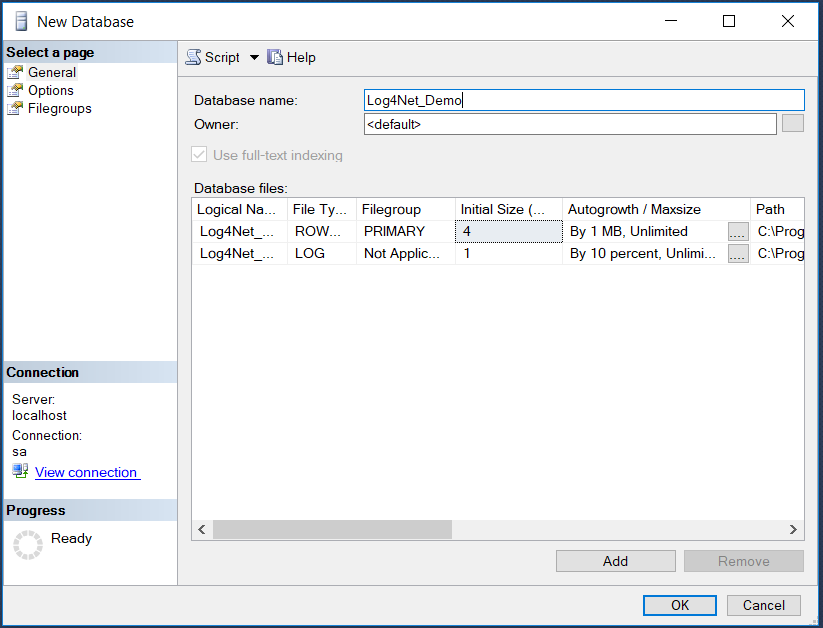
Step 8: Just type the name of the database in the text-box like below.
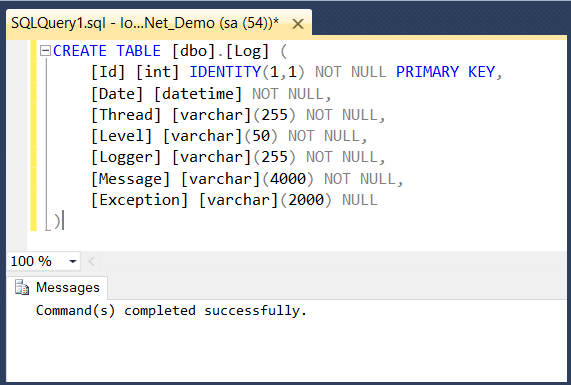
Step 9: Now, execute below script on this newly created database. This script will create the table where log4net will log the records.
CREATE TABLE [dbo].[Log] (
	[Id] [int] IDENTITY(1,1) NOT NULL PRIMARY KEY,
	[Date] [datetime] NOT NULL,
	[Thread] [varchar](255) NOT NULL,
	[Level] [varchar](50) NOT NULL,
	[Logger] [varchar](255) NOT NULL,
	[Message] [varchar](4000) NOT NULL,
	[Exception] [varchar](2000) NULL
)
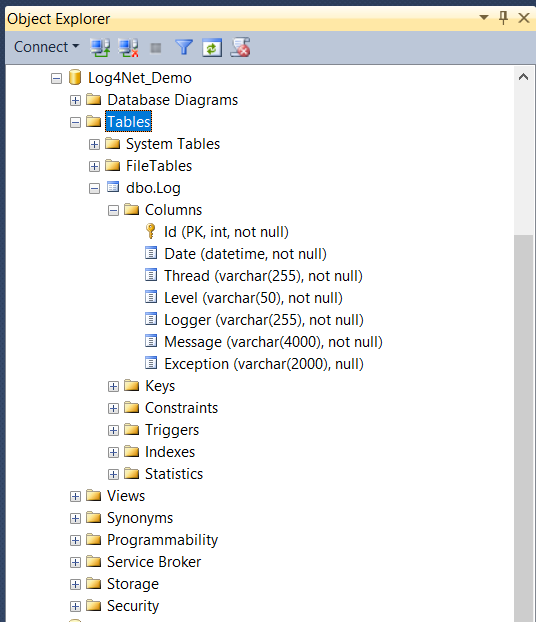
Step 10: Once you execute above script, Log table will look like below in SQL Server.
Step 11: Now you need to add some configurations in your web.config file that Log4Net uses to log records.
We will add these configurations in two steps.
First, add log4net section inside configSections like below.
<configSections>
    <section name="log4net" type="log4net.Config.Log4NetConfigurationSectionHandler, log4net" />
</configSections>
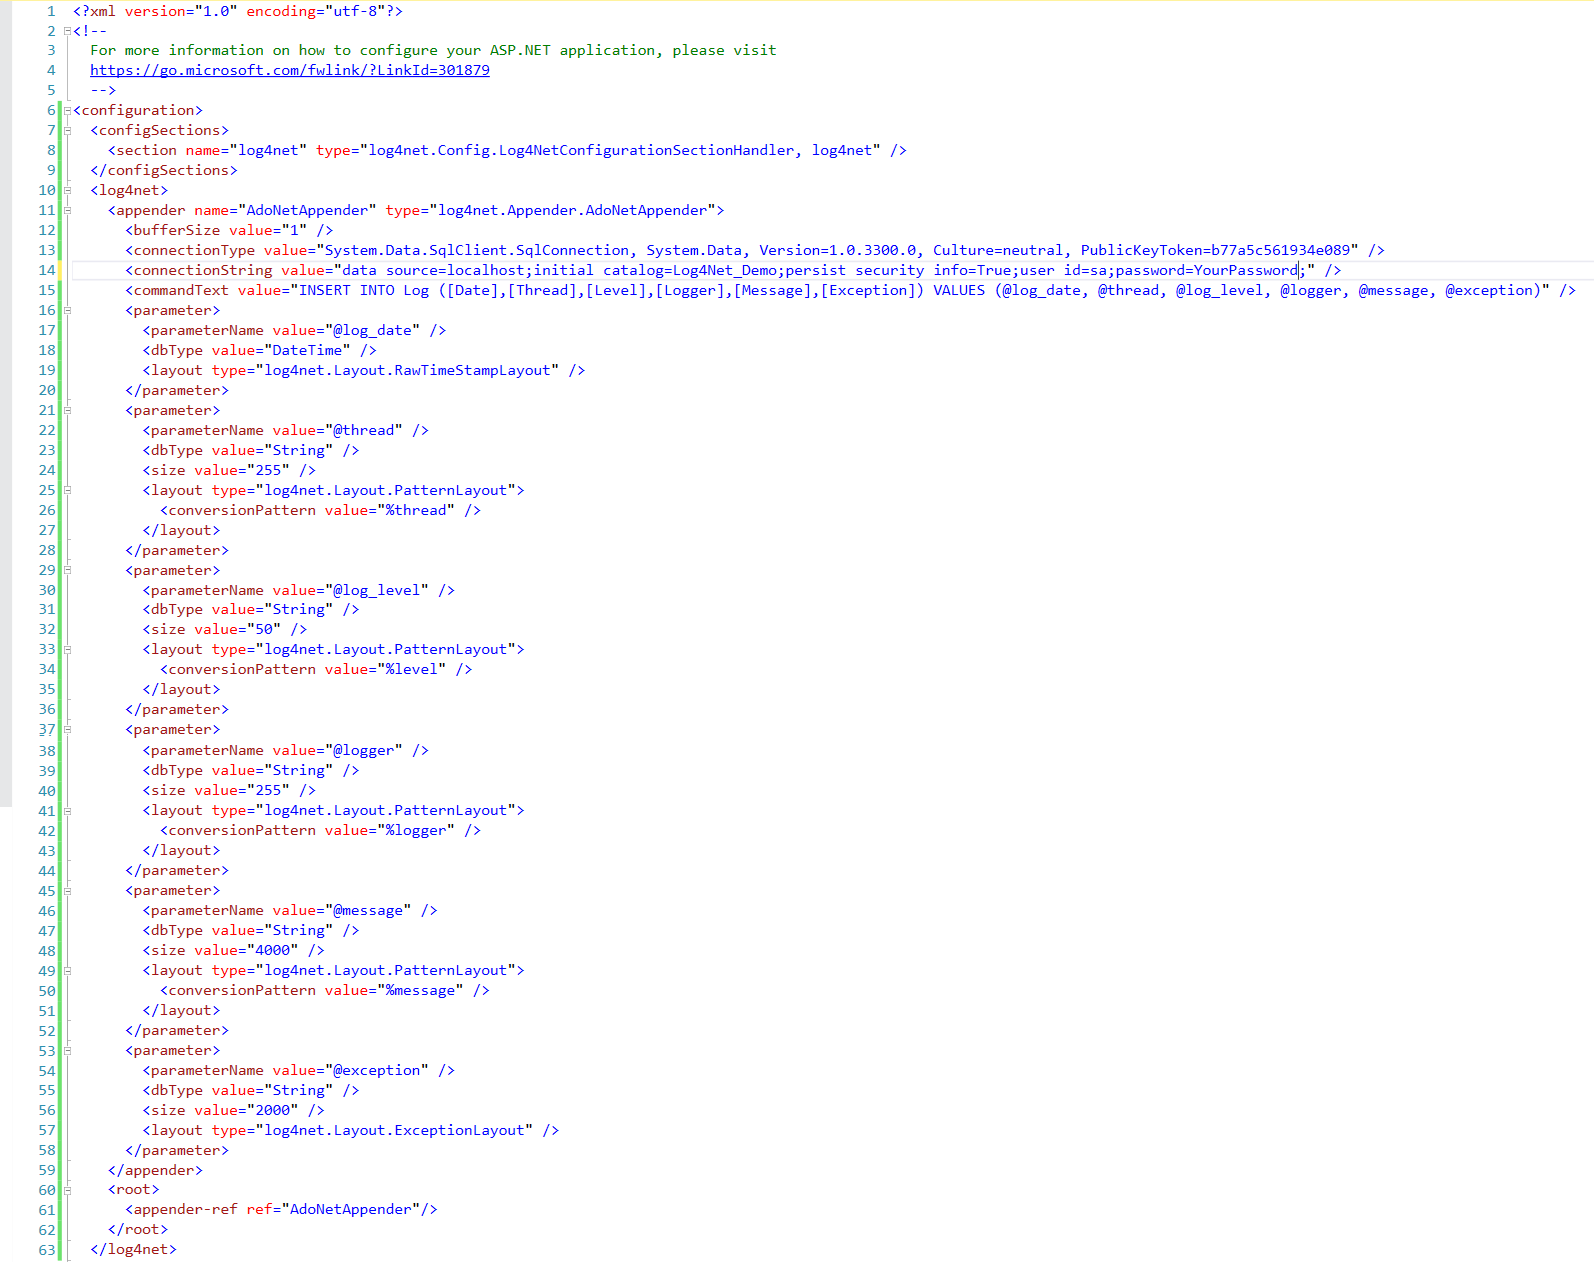
Secondly, add below log4net section in root configuration node. (Note: Update connection string according to your environment).
<log4net>
	<appender name="AdoNetAppender" type="log4net.Appender.AdoNetAppender">
	  <bufferSize value="1" />
	  <connectionType value="System.Data.SqlClient.SqlConnection, System.Data, Version=1.0.3300.0, Culture=neutral, PublicKeyToken=b77a5c561934e089" />
	  <connectionString value="data source=localhost;initial catalog=Log4Net_Demo;persist security info=True;user id=sa;password=yourPassword;" />
	  <commandText value="INSERT INTO Log ([Date],[Thread],[Level],[Logger],[Message],[Exception]) VALUES (@log_date, @thread, @log_level, @logger, @message, @exception)" />
	  <parameter>
		<parameterName value="@log_date" />
		<dbType value="DateTime" />
		<layout type="log4net.Layout.RawTimeStampLayout" />
	  </parameter>
	  <parameter>
		<parameterName value="@thread" />
		<dbType value="String" />
		<size value="255" />
		<layout type="log4net.Layout.PatternLayout">
		  <conversionPattern value="%thread" />
		</layout>
	  </parameter>
	  <parameter>
		<parameterName value="@log_level" />
		<dbType value="String" />
		<size value="50" />
		<layout type="log4net.Layout.PatternLayout">
		  <conversionPattern value="%level" />
		</layout>
	  </parameter>
	  <parameter>
		<parameterName value="@logger" />
		<dbType value="String" />
		<size value="255" />
		<layout type="log4net.Layout.PatternLayout">
		  <conversionPattern value="%logger" />
		</layout>
	  </parameter>
	  <parameter>
		<parameterName value="@message" />
		<dbType value="String" />
		<size value="4000" />
		<layout type="log4net.Layout.PatternLayout">
		  <conversionPattern value="%message" />
		</layout>
	  </parameter>
	  <parameter>
		<parameterName value="@exception" />
		<dbType value="String" />
		<size value="2000" />
		<layout type="log4net.Layout.ExceptionLayout" />
	  </parameter>
	</appender>
	<root>
	  <appender-ref ref="AdoNetAppender"/>
	</root>
</log4net>Important: In current post, we are using
AdoNetAppenderappender that is used to log data in SQL Server. If we want to change the target, we can use different type of log4net appender. For example, we have different types of Appenders in Log4Net.
- AdoNetAppender
- FileAppender
- SmtpAppender
- Complete List of Appenders
Below picture will give you more clarity on where you need to place above configurations in web.config file.
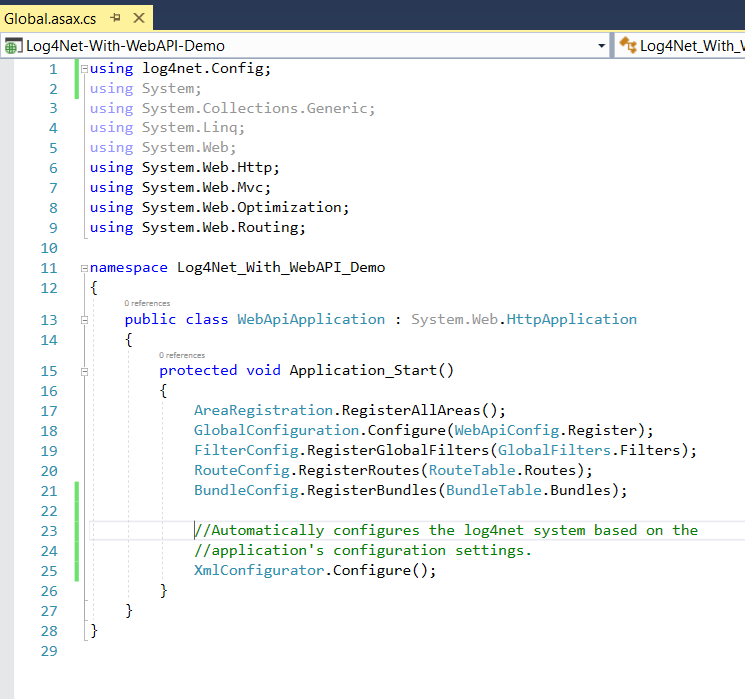
Step 12: Now, back in Web API project. Open Global.asax file and add XmlConfigurator.Configure();at the end of Application_Start event handler. Log4Net uses this method to read the configurations from config file and do it's initialization stuff.
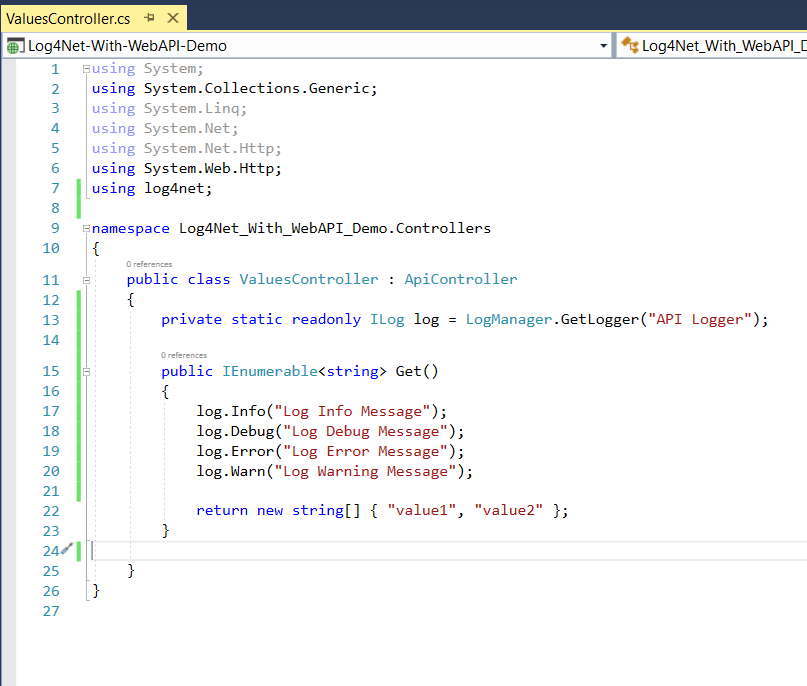
Step 13: Now, modify the code of ValuesController like below, just to test the Log4Net integration. You can also copy & paste the code from here.
public class ValuesController : ApiController
{
    private readonly ILog log = LogManager.GetLogger("API Logger");

    public IEnumerable Get()
    {
        log.Info("Log Info Message");
        log.Debug("Log Debug Message");
        log.Error("Log Error Message");
        log.Warn("Log Warning Message");

        return new string[] { "value1", "value2" };
    }
} 
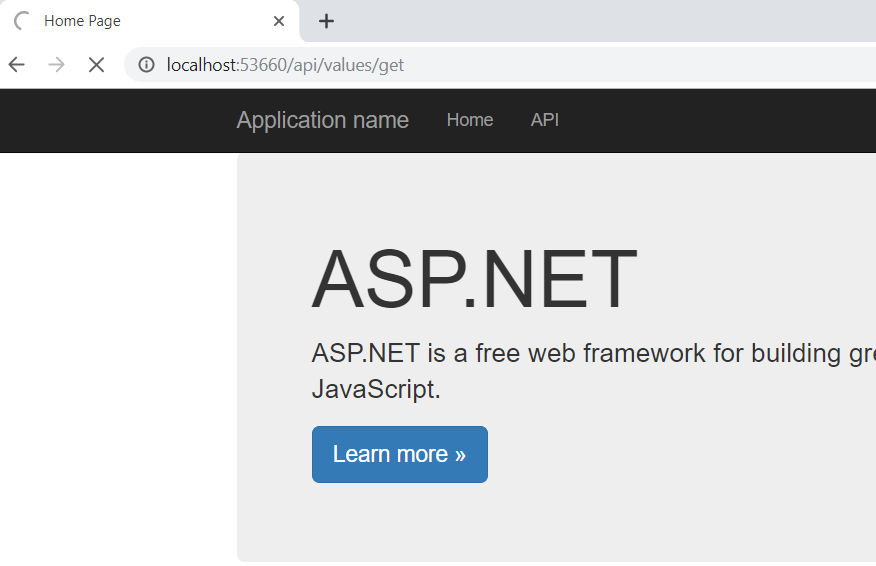
Step 14: Press the F5 button to run the application and hit the Values controller like below. (Note: Application port may vary from below picture)
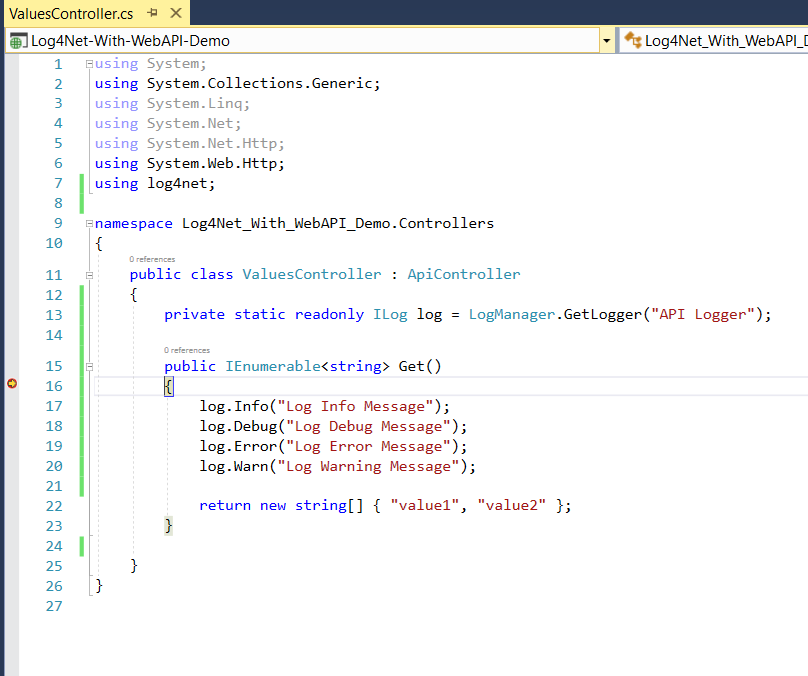
Step 15: You will see that application hits the break-point when you access the Values controller from browser. And it will also logs the records in your connected database.
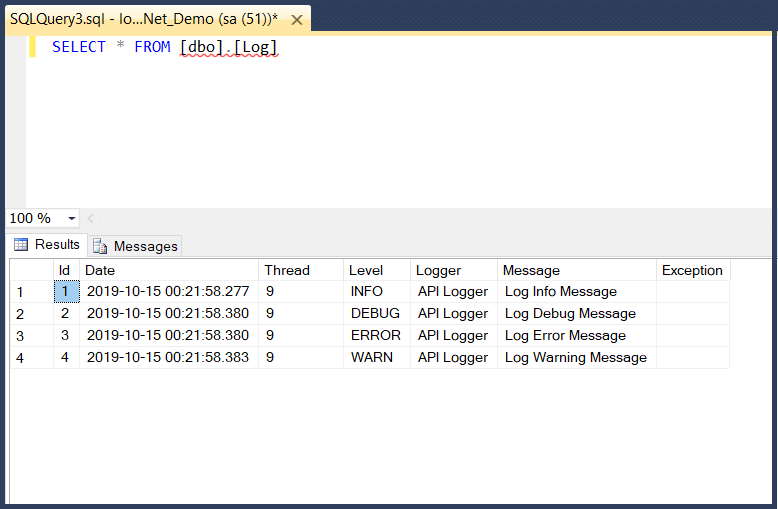
Step 16: Just verify the data in Logs table by executing the script Select * FROM [dbo].[Logs]. You will find that all log data have been logged successfully into your SQL Server database.
That's all. Please share your comments, suggestions or feedback in below comment box.